
Tissue Paper Bird Suncatcher
This tissue paper bird suncatcher is SO easy to make and is the perfect way to use all of that saved up tissue paper! No printable is needed here as it really couldn’t be easier to draw your own bird shape but don’t worry if you are unsure how as we will step you through the process. A great craft that kids of all ages can take part in!
Tissue Paper Bird Suncatcher
This post contains affiliate links. These links add no cost to you but we earn a commission through linked sales. This helps us to keep bringing free content to you. Thank you for your support!

I have a habit of saving up all sorts of bits and pieces that could be used again. Not great for living a simple uncluttered life but great for doing fun crafts without spending lots of money! Tissue paper is something I love to save but now it is getting to the stage where we really do need to start using it! We have been seeing lots of amazing suncatcher crafts recently which has inspired me to come up with our own cute tissue paper bird suncatcher.
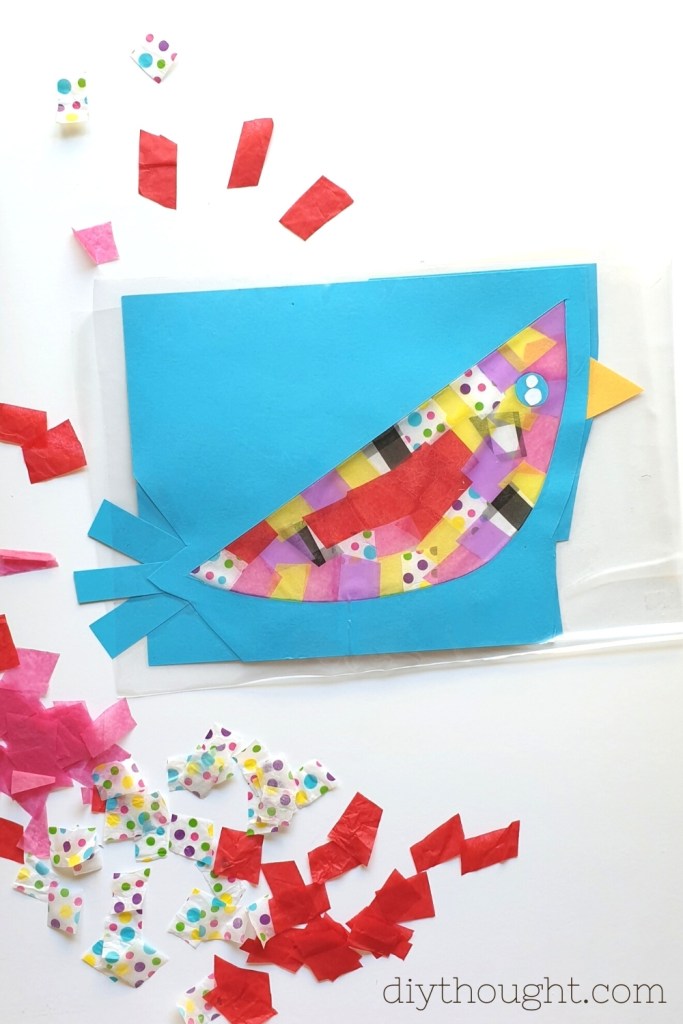
This bird is basically a half-circle with a beak, eye, and tail feathers, so simple! Often we include printables to go alongside our crafts that require drawing but honestly anyone of any drawing level can draw this without a printable!

Materials Needed
You can buy tissue paper in lots of different colors, alternatively, save up tissue paper and use it for this craft.x2 pieces of Cardstock- any color
- Cardstock for bird outline
- Cardstock or paper in any color for the beak
- Tissue Paper
- Clear book cover/ Adhesive contact liner
- Scissors
- Craft knife
- Ruler
- Pencil or pen
Let’s Get Creating
For younger children, it is a good idea to premake the bird outline and prep the tissue paper squares. Older children will be able to help out with these steps but will need help cutting the inner half-circle out with the craft knife.
Draw the bird

Start by drawing your bird. To do this you will need the cardstock, a ruler and a pencil or pen. Draw a straight line about the length of the piece of cardstock on the diagonal. Connect the two ends with a curved line. You should now have a sort of half-circle shape, perfect to be transformed into a bird! Now you need to add this same shape either around the outside or inside of the half-circle leaving a couple of centimeters (or a little over 1/2 an inch) between the two lines. have a look at the photo if you need extra guidance. Don’t worry about the second piece of cardstock, we will get to that soon.
Cut out the bird
Cut out the center of your bird using the craft knife. Be careful (an adult should do this part) and make sure you have the cardstock on a surface that doesn’t matter if it gets cut such as an old magazine or thick cardboard. If you feel like this is too challenging you can cut the two pieces of cardstock at one time by layering them. Alternatively, once the center of the bird has been cut from the first piece of cardstock place this piece on top of the other sheet of cardstock and draw around the outline, and then cut out.
You can now cut out the section around the top of the bird where the beak will go as well as around the tail. We kept the rest of the cardstock on as it is easier to place onto the clear adhesive contact paper this way.
Extra details
Cut three long rectangles for the tail feathers and a triangle for the bird’s beak. Make an eye (or two if you want one on each side) by cutting a circle from paper or cardstock.
Cut the tissue paper into small squares and put into piles of different colors.
Decorate
Now for the fun part, decorating! Measure out the clear contact liner, you can either fold it in half to cover or cut out two pieces to cover each side. Sick one of the bird outlines down onto the contact paper. Place on the tail feathers and beak. Don’t worry if these are not completely covered with the clear contact liner.
Before you add the tissue paper stick-on the eye, detailed side down. Place pieces of tissue paper onto the clear contact liner to form any pattern you like. You can add one color to the center to create a wing. one completely covered add on the other eye if using.
Cover with the remaining clear contact liner. Cut around the edge of the bird.
Hang
To hang up we used a glue stick. You could also use a little Blu Tack to adhere the bird to a window.

Other Fun Crafts To Try
- Popsicle Stick Birdhouse Craft
- Recycled Collage Sun Craft
- How To Make A Super Easy Bird Kite
- How To Make Fingerprint Birds
Thank you for stopping by. We hope you enjoyed this tissue paper bird suncatcher craft today!


latest video
news via inbox
Nulla turp dis cursus. Integer liberos euismod pretium faucibua


[…] Check it here. […]
[…] Check it here. […]
[…] Tissue Paper Bird Suncatcher […]